
In this series of blog posts we’re taking a deep dive into the new on-device model personalization features from Core ML 3. I’ll show how to create a customizable image classifier using k-Nearest Neighbors as well as a deep neural network, right from inside an iOS app.
This is part 2 of a four-part series:
- Introduction to on-device training
- Rock, Paper, Scissors (Lizard? Spock?)
- k-Nearest Neighbors
- Training a Neural Network
Follow along with the source code on GitHub.
Rock, Paper, Scissors (Lizard? Spock?)
In this blog post, we’re going to build a simple image classifier that can detect hand gestures from photos. I’ve already provided training data for three classes that you could use to make a rock-paper-scissors game, but you can also add your own hand gestures for 🦎 or 👽 or whatever you want. That’s the personalization part.
In the previous post, I claimed that on-device personalization only makes sense if you can train on data that is specific to the user. For instance, a messaging app can learn from the texts the user is sending and receiving in order to suggest responses. With that in mind, rock-paper-scissors may not seem like the kind of thing you ought to use on-device personalization for…
For a rock-paper-scissors game, you’d want to ship the app with a fully-trained model that has learned from many hundreds of images of hands in all kinds of shapes, sizes and skin colors, against a variety of backgrounds and under many lighting conditions. It makes little sense to tailor this kind of model only to the hands of the user. Quite the opposite… you’d want a model that works well for everyone.
But what if you want to allow users to add their own hand gestures to the game? There is no way of knowing beforehand what kind of gestures they’d want to add. Now you’ll need some way to update the model on the device so it can learn from this new data.
In the next installments of this series, I’ll show two different methods for building this hand gestures model: using k-Nearest Neighbors and using a neural network. But first, let’s talk data.
Making the dataset
To train a model you need labeled data. In the repo for this blog post, you’ll find a Dataset folder. This includes a small training dataset with 10 images per class and a test set with 5 images per class.
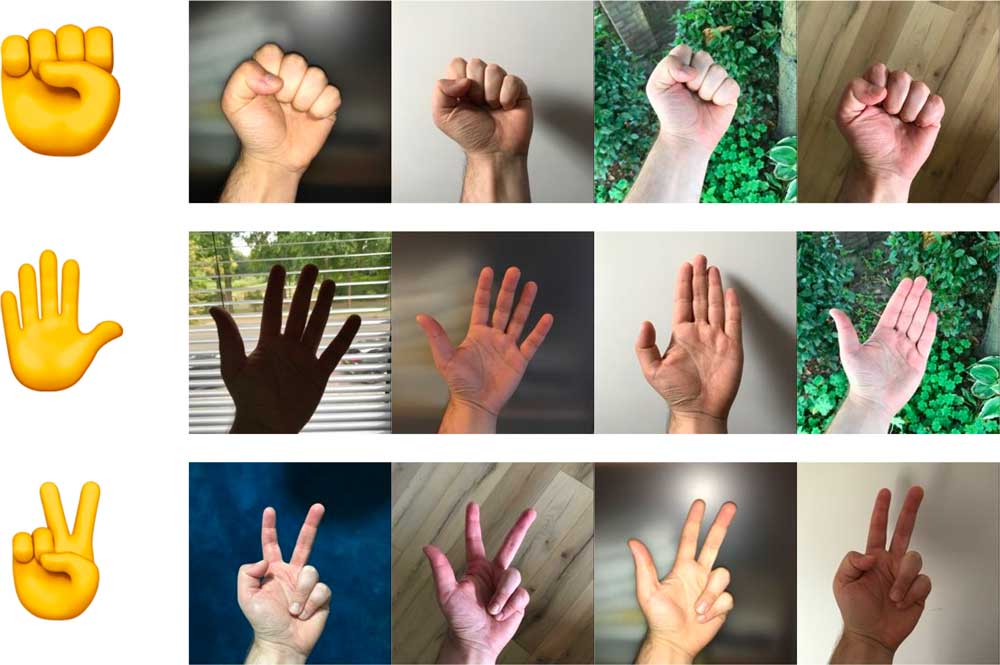
These are the three classes:
✊ rock
✋ paper
✌️ scissors
I simply went around the house and took photos of the different hand gestures against various backgrounds under different lighting conditions. I also made sure to vary the hand poses slightly. For example, for the “scissors” pose sometimes the thumb is tucked in and sometimes it isn’t.
I took 10 training photos for each gesture and 5 test photos. Obviously, this is not a lot of training data. However, since we’ll be using transfer learning, we won’t need massive amounts of data.
Note that this dataset is obviously very biased. If you don’t have pink skin like I do, these training images may not work very well for you. But this blog post is all about on-device personalization, so the app will let you add your own photos. 🖖🏾
There is also a more subtle bias in the training set. All my training images are of the left hand (I used my right hand to operate the phone). Of course, we want the app to detect gestures of the right hand too! We can achieve this by flipping the images horizontally and vertically during training, known as data augmentation.
Another bias: It happened to be a warm day when I took these photos and I wore short sleeves. Because of this, we might end up with a model that gets confused when people are wearing long-sleeved shirts, dresses or coats.
This is why it’s important to collect as much training data as possible: it reduces the chances that these kinds of biases creep into your dataset. It would have been better if I had collected 100 instead of 10 images per class, on different days, from different people.
In the test set, the images are not all from the left hand and are taken from a few different angles, so that we can test if the data augmentation had any effect. It also includes some photos with me wearing a hoodie instead of short sleeves. It’s good to make your test set difficult on purpose.
You’re not limited to just the three classes ✊ ✋ ✌️, you can also add new types of hand gestures to the app. Let’s look at the app in more detail.
The demo app
It’s a good idea to follow along with the code, so clone the repo and open iOS App/Gestures.xcodeproj in Xcode 11 or later.
The main screen of the app looks like this:

This is like a baby version of Create ML on the iPhone. It lets you gather training and testing data, train two different types of models using that data, and evaluate how well they work using the test set or the camera.
The data screen
The app has a few different options for managing the dataset. Tapping Training Data or Testing Data opens a new screen that lets you import images from the photo library or use the camera to take new pictures.
Initially, there are no images here. If you want to use my small dataset, first tap Load Built-in Dataset.
The data screen looks like this:
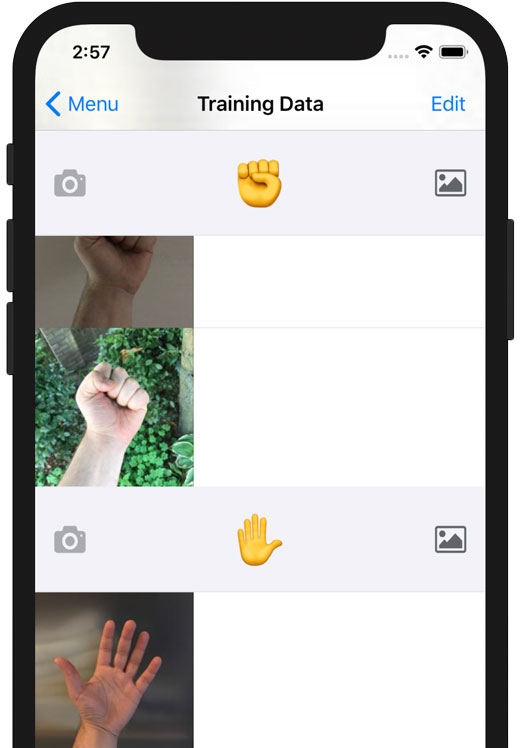
It’s just a list of images, grouped by their class label. Use the camera or picture button to add new images.
You can also swipe-to-delete images that you don’t want. (Feel free to delete my images, you can always get them back by pressing Load Built-in Dataset again.)
When you add an image, it is saved as a JPEG file in the app’s Documents directory. The image is scaled down from its original size to 256 pixels on the smallest side; the other side is scaled proportionally so that the aspect ratio stays the same. We do this because smaller images are quicker to load, and the model only works on small images anyway.
The models we’re going to build use SqueezeNet v1.1 as the feature extractor. This expects images of 227×227 pixels, so our training images are slightly bigger than what SqueezeNet needs. This is actually useful for data augmentation: because the images are slightly too big, we can make random crops.
Note: The images in the built-in dataset are actually only 224 pixels on the smallest side instead of 256, because I originally wanted to use a different neural network. These images are therefore a little smaller than what SqueezeNet needs, but this is no problem as we’ll tell Core ML to scale them to 227×227 pixels when they are loaded.
The logic for both the Training Data and Testing Data screens is implemented in DataViewController. There really isn’t much to it… this is just a plain old table view controller.
Most of the work is handled by the following classes:
ImageDataset. This is the main class for accessing the training and testing data. This is simply a list of all available images and their labels. It scans the app’s Documents directory to see which images are available and which class they belong to.ImageDatasetdoesn’t actually load the images, it just tells you where the images are located in the file system.The app has two
ImageDatasetinstances:trainingDatasetfor the images from the train folder, andtestingDatasetfor the images from test.ImagesByLabel. This is a simple wrapper aroundImageDatasetthat groups the images by their class label. This isn’t used by any of the training logic, only for presenting the user interface.DataViewControlleruses this as the data source for the table view sections.
Have a look at ImageDataset.swift. It’s pretty straightforward code, and you’ll need to create something similar for the training data in your own app.
The images get stored in the app’s Documents folder. That seems like a good place for it, as this is where user data normally goes in iOS apps. Initially, there is nothing there. When you tap Load Built-in Dataset, the app copies the default training images from the application bundle into the Documents folder.
Adding new classes
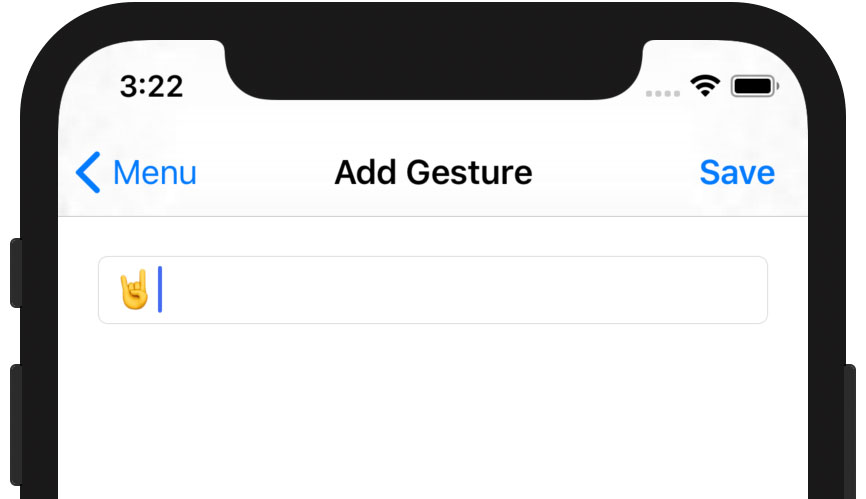
Unlike other, clearly inferior, versions of rock-paper-scissors, this one lets you add new gestures for even more excitement! Tap Add Gesture to do so:
This UI is implemented in AddGestureViewController. Managing the labels for the gestures is the job of the Labels object.
When you tap Save, the app creates a new folder named after what you just typed into the text field (tip: it doesn’t have to be a hand emoji). This subfolder is added to both the train and test folders in the app’s Documents directory.
The new class names are saved in the file labels.json, to remember the order in which they were added, even if you restart the app. Why not use something like alphabetical ordering? For the neural network it is important that the same class will always be associated with the same output neuron. If the order of the output neurons would change when adding a new class, the predictions from the neural network will no longer make sense.
There’s a limit of 10 classes. This is also a restriction of the neural network, which has a fixed number of output neurons (in this case, 10). You can’t add more classes than the neural network has output neurons. Note that for nearest neighbors, the number of classes you can add is virtually unlimited.
Bring your own images!
I suggest that you run the app and snap some of your own pictures for training and testing. The more photos you can take, the better!
The photos don’t have to be perfect — in fact, having some blurry training images will help, as photos taken by the user will also often be blurry.
What’s important is to vary the things that you want the model to not care about. By using many different backgrounds, the model will learn that the background is not important. Likewise for wearing different clothes, using photos of people with different skin colors, and so on…
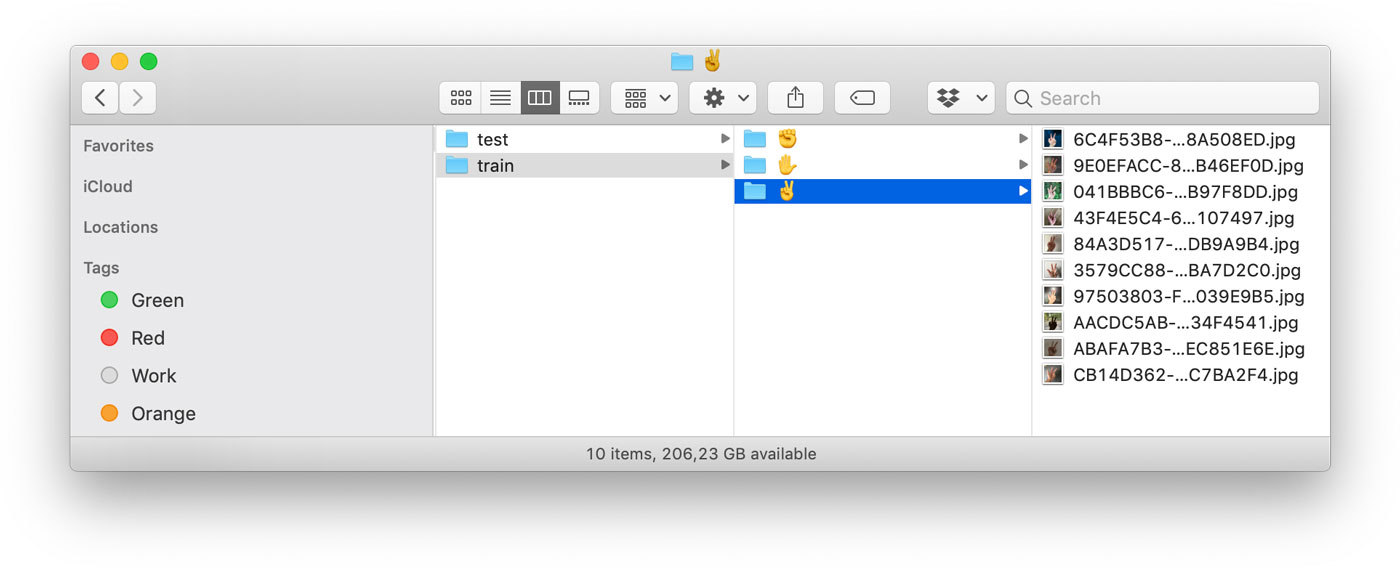
Tip: Collecting training images can take a lot of time, and it’s a good idea to back them up in case something goes wrong. To safeguard the photos you took, use Xcode’s Devices and Simulators window to download the app’s container from the phone onto your Mac. This downloads all the training images, including the ones you added.
If your lust for ever more data is insatiable, here are some other datasets that you can use for rock-paper-scissors images:
- https://github.com/alessandro-giusti/rock-paper-scissors
- http://www.laurencemoroney.com/rock-paper-scissors-dataset/
- https://www.kaggle.com/drgfreeman/rockpaperscissors/version/2
Some googling should also let you find datasets for other types of hand gestures. (Although many seem to be based on depth information from 3D sensors rather than the usual RGB photos; let me know if you find a good one.)
Simply copy the image files into the Dataset folder and rebuild the app (both .jpg and .png images are supported). To add a new class, simply create a subfolder with an appropriate name and put the images into that. Also add the folder name to builtinLabelNames in ImageDataset.swift.
Press the Load Built-in Dataset button again to copy the new images into the app’s Documents folder.
I didn’t want to include a huge dataset with this demo app, which is why the built-in one is only 45 images total, but more images is always better. However, too many images also means the model takes forever to train, so don’t go overboard either…
Evaluating the model
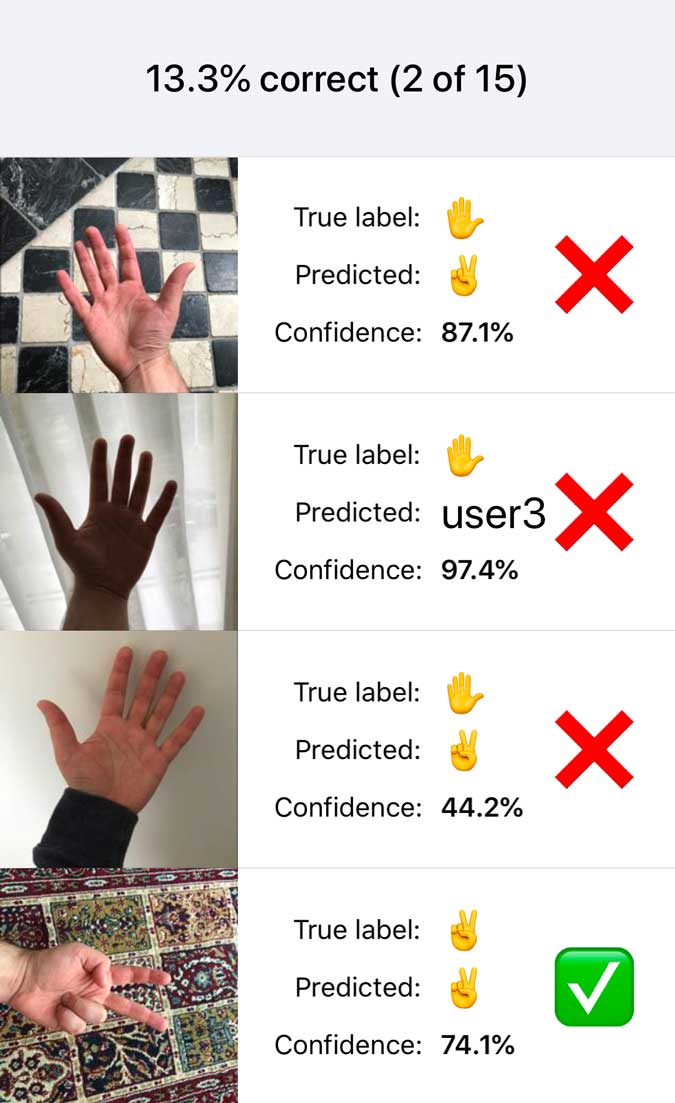
The app’s main screen has two Evaluate buttons, one for the k-NN model and one for the neural network. Now that you have added some testing data to the app, tap these Evaluate buttons. This will run the chosen model on the test set and shows the results:
If you haven’t done any training yet, the k-Nearest Neighbors model should give a score of 0% correct because it literally does not know anything. It predicts “???” for every test image. This model is HandskNN.mlmodel in the Xcode project.
For the untrained neural network, the learned parameters of the classifier layer are chosen at random, which means its predictions are no better than chance. Because we have 3 classes ✊ ✋ ✌️, you might expect this model to be correct 1/3rd of the time for a 33% accuracy. However… in order to let the user add new classes, the neural network actually has a total of 10 output neurons and so its random guesses are only correct about 1/10th of the time, or 10% accuracy.
Note: Because the test set is so small, the percentage correct on the untrained model can vary quite a bit, depending on how the random weights were assigned. You can see this for yourself by running Scripts/make_nn.py from the repo. This creates the neural network model using different random weights each time you run it. Then build the app again and tap Reset to Empty Model. The new evaluation score can be as low as 0% or even as high as 40%, because on just 15 images a single image being correct or incorrect makes a big difference. On a larger test set, you should consistently get 10% accuracy with an untrained model.
As you can tell from the above screenshot, this particular version of the neural network either predicts everything to be ✌️ or “user3”, which is a placeholder for one of the additional gestures that the user can define.
The untrained neural network is HandsEmpty.mlmodel in the Xcode project.
The Xcode project also includes HandsTuri.mlmodel. This is an image classifier that was trained with Turi Create. Because I didn’t know if my small dataset was going to be any good, I started this project by quickly training a model using Turi Create. It got 80% test accuracy, so that’s not too bad. (Look at the Scripts/TuriCreate.ipynb notebook to see how I made this model.)
I decided to include the Turi Create model in the app because I was curious if on-device training works better on a pre-trained classifier vs. a totally untrained one. Plus it gives us something to aim for.
To use this pre-trained model instead of the completely untrained neural network, tap Reset to Turi Create Model. The Evaluate screen should now give 80% correct on the test set, which means it predicts 3 out of 15 images wrong. (The ✌️ category is hardest, apparently.)
Even though these three mlmodel files are different on the inside, they all have the same inputs and outputs:
- The input is named image and expects a 227×227 RGB image.
- The outputs are typical for a Core ML classifier: labelProbability is a dictionary of predicted probabilities for the classes, and label is the name of the class with the largest probability.
The models we’ll be training also have these same inputs and outputs. That way, we can easily swap out one model for another and use the exact same code to evaluate them.
The code for the Evaluate screen lives in EvaluateViewController. It’s mostly UI stuff for managing the table view with the results. The interesting things happen in the following classes:
ImageLoader. This loads the images from theImageDataset. It also combines multiple images into mini-batches, optionally shuffles the order of the images (important for training), and can perform on-the-fly data augmentation.Predictor. Uses anImageLoaderto make predictions on anMLModelobject. and returns one or morePredictionobjects. This is really nothing more than a fancy way to call the standard Core ML APImodel.prediction(image:). But since we can do predictions from multiple places in the app, I decided to put it into this helper class.
The app also has a Camera button. This lets you test the model on a single image.
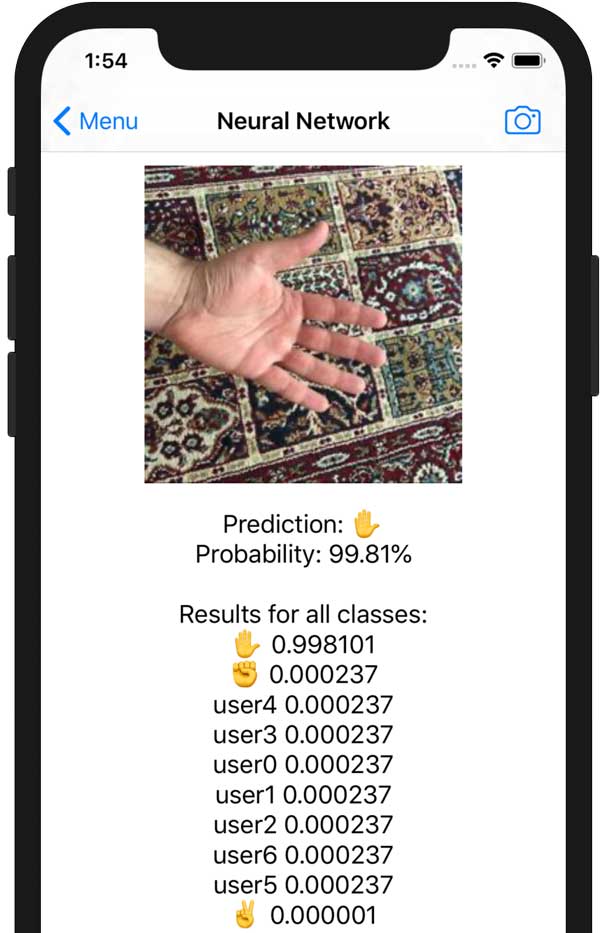
This code is in CameraViewController. It uses UIImagePickerController to grab a new image from the camera and then calls Predictor to make the prediction.
Note that Predictor is not using the Xcode-generated class to run the Core ML model. Normally, you would write the following:
let model = HandsTuri()
let somePixelBuffer: CVPixelBuffer = ...
let predictions = try? model.prediction(image: somePixelbuffer)
However, here we’re dealing with different models — HandsTuri, HandsEmpty, and HandskNN — that we want to use with the same prediction code. So instead of the generated class, Predictor directly uses the MLModel API.
Using MLModel is a bit more involved than using the Xcode-generated class, but on the upside, it lets us take advantage of some new functionality that was introduced with Core ML 3. I will now describe how this works.
MLFeatureValue
So far everything I’ve shown has been old stuff that was already possible with Core ML in iOS 11 and 12. With one exception…
Previously, to run a Core ML model on an image, you had to convert the image to a CVPixelBuffer object or use the Vision framework to drive Core ML.
As of Core ML 3, there is a new API on MLFeatureValue that lets you directly use CGImage objects and image files such as PNG and JPEG. You no longer need to use helper code or go through Vision.
If you’ve used Core ML before, you probably did so through the class that Xcode automatically generated for you. That’s the most convenient way but it also hides a lot of the finer details of using Core ML.
For example, if you look at the generated code for HandsTuri.mlmodel, you’ll see there is a HandsTuri class with a prediction(image: CVPixelBuffer) method. There is also a prediction(input:) method that takes a HandsTuriInput object. The CVPixelBuffer version of prediction() actually wraps the pixel buffer inside a HandsTuriInput object and then calls the other method.
If you dig a little further, you’ll see that HandsTuriInput is a class that conforms to the MLFeatureProvider protocol. It has a method featureValue() that returns an MLFeatureValue?. Inside this method it converts the CVPixelBuffer into such an MLFeatureValue object.
So it turns out that Core ML doesn’t really accept pixel buffers — or strings or ints or doubles — but expects all input data to be wrapped inside MLFeatureValue.
Normally you don’t need to worry about this — simply use the convenience APIs and they’ll take care of these details behind the scenes. However, you get more control over what happens by making your own MLFeatureValue objects.
As of iOS 13, you can create an MLFeatureValue object directly from an image file or a CGImage object, bypassing the need for messing with CVPixelBuffer objects yourself. That’s exactly what happens in my ImageLoader class, inside the method featureValue(at):
func featureValue(at index: Int) throws -> MLFeatureValue {
  let imageOptions: [MLFeatureValue.ImageOption: Any] = [
    .cropAndScale: VNImageCropAndScaleOption.scaleFill.rawValue
  ]

  let imageURL = dataset.imageURL(at: index)

  return try MLFeatureValue(imageAt: imageURL, constraint: imageConstraint,
                            options: imageOptions)
}
Given the index of an image in the ImageDataset, this method loads the image file from the app’s Documents folder and turns it into a new MLFeatureValue.
After the call to try MLFeatureValue(…) succeeds, the feature value object now contains a valid CVPixelBuffer object of the size expected by the model (227×227 pixels) and in the correct pixel format (RGB).
But how does MLFeatureValue know what the correct size and pixel format are? Well, you need to tell it about those. You can pass in hardcoded numbers for the width, height etc., but I find it easier to grab the MLImageConstraint object from the mlmodel itself. You can do this as follows:
let imageConstraint = model.modelDescription
                           .inputDescriptionsByName["image"]!
                           .imageConstraint!
Here, model is an MLModel instance. It has a modelDescription that describes the properties of the model. This lets you programmatically access the same info that’s shown in Xcode’s mlmodel viewer.
Simply grab the description of the input you’re interested in — named image in our models — and ask it for the imageConstraint property. This MLImageConstraint object describes the size and format of the image that is expected by this particular model input.
Note: It’s OK to force-unwrap here as the app shouldn’t be allowed to run if there is something seriously wrong with the Core ML model. It’s better to crash.
You also provide a dictionary of MLFeatureValue.ImageOption values. This tells Core ML how to scale and/or crop the input image.
- With
.cropAndScaleyou can pass in aVNImageCropAndScaleOptionvalue from the Vision framework. So this new API can behave in exactly the same way as Vision. (Note that you need to pass in the.rawValue!) - You can also pass in a
.cropRectrectangle for doing a custom crop. This is aCGRectobject using normalized coordinates (i.e. between 0 and 1).
You can even combine these two options. More about this when we talk about training and data augmentation. For making predictions, we’re using .scaleFill, which stretches the image to fill the entire 227×227 pixels.
Passing the MLFeatureValue to the model
Once you have an MLFeatureValue object that contains an image, you need to put it inside an MLFeatureProvider object.
Where MLFeatureValue describes the data for a single input, MLFeatureProvider tells Core ML which input gets which MLFeatureValue.
In the class that Xcode generated for the Turi Create model, HandsTuriInput was the feature provider. But we’re not using the generated class in the Evaluate and Camera screens, and so we’ll have to make our own MLFeatureProvider object.
One way to do this, is to implement a new class and make it conform to the MLFeatureProvider protocol, but fortunately Core ML has a handy helper class that saves us the trouble, MLDictionaryFeatureProvider.
You use it as follows:
let inputs: [String: Any] = [ "image": featureValue ]
if let provider = try? MLDictionaryFeatureProvider(dictionary: inputs),
   let result = try? model.prediction(from: provider,
                                      options: predictionOptions),
   let predictedLabel = result.featureValue(for: "label")?.stringValue,
   let probabilities = result.featureValue(for: "labelProbability")?
                             .dictionaryValue,
   let predictedProbability = probabilities[predictedLabel]?.doubleValue {
  // yay! we have a prediction
}
First you create a dictionary that says the input named image will be given the MLFeatureValue object in question. If your model has more than one input, you’d list the others and their MLFeatureValues here too.
You pass this dictionary into MLDictionaryFeatureProvider, and then use the provider object to make the prediction. The result is another MLFeatureProvider object. This contains MLFeatureValues for the model’s outputs, in this case a string value named label and a dictionary named labelProbability with the predicted probabilities.
If this looks like a lot of effort to make a prediction — wrap the input value in some object, that gets wrapped into another object, and doing the reverse for the output values — then you’re right. That’s why the Xcode-generated class exists: to hide a lot of this boilerplate stuff from you. Look inside the generated class and you’ll see that it does exactly this stuff behind the scenes.
Speeding it up with batches
You’ve seen how to make a prediction for a single image at a time. Core ML also lets you put multiple images into a mini-batch. This is often a bit more efficient.
By doing a whole bunch of work at once, Core ML is better able to utilize the full bandwidth of the CPU / GPU / Neural Engine and can avoid some of the overhead involved in doing these computations.
The Evaluate screen uses such mini-batches. You can play around with this by changing the batchSize variable. Setting it to 1 disables batching.
Implementing batches in Core ML is simply a matter of wrapping your feature providers into a new MLBatchProvider object. In Predictor’s predict(batch:) method you can see how this works. Here’s a snippet:
var batchInputs: [MLFeatureProvider] = []
for featureValue in batch {
  let inputs: [String: Any] = [ "image": featureValue ]
  let provider = try MLDictionaryFeatureProvider(dictionary: inputs)
  batchInputs.append(provider)
}
Here, batch is an array of MLFeatureValue objects containing the input images. We make a new MLDictionaryFeatureProvider for each image, just like before, and add these to an array, batchInputs.
Next up, we’ll create the MLBatchProvider and make the predictions. You can implement your own batch provider class but it’s easiest to use the built-in class MLArrayBatchProvider:
let batchProvider = MLArrayBatchProvider(array: batchInputs)
let batchResult = try model.predictions(from: batchProvider,
                                        options: predictionOptions)
The result from doing a batch prediction is another MLBatchProvider object. To get the prediction for each image from the batch, you loop through it:
for i in 0..<batchResult.count {
  let result = batchResult.features(at: i)
  ...
}
Each of these result objects is an MLFeatureProvider and you can query it just like I showed before.
The reason I mentioned all this stuff about MLFeatureValue and batches is that we will use it during training as well. This is how we’ll be loading the training data and passing it to Core ML.
And that concludes this episode…
Phew! I think I’ve explained all the preliminaries now. You’ve seen that the training and testing datasets are described by the ImageDataset class, that there is an ImageLoader class that can load the images into MLFeatureValue objects and combine them into mini-batches, and that there is a Predictor class that uses the MLModel API to actually make the predictions.
Check out the source code on GitHub if you haven’t already.
👍 Keep reading: Continue to part 3, k-Nearest Neighbors, where we’ll finally do some training!
First published on Saturday, 10 August 2019.
If you liked this post, say hi on Twitter @mhollemans or LinkedIn.
Find the source code on my GitHub.
 New e-book: Code Your Own Synth Plug-Ins With C++ and JUCE
Interested in how computers make sound? Learn the fundamentals of audio programming by building a fully-featured software synthesizer plug-in, with every step explained in detail. Not too much math, lots of in-depth information! Get the book at Leanpub.com